Best Text Animation Software for Windows
Want to spice up your slideshow or tell a real photo story? Do it with animated text effects! Whether you want to create title clips, insert subtitles or type in some greeting words, you cannot do without text editing tools that come with SmartSHOW 3D. This 3D text animation software has brought brand-new opportunities of working with text and directing its movement on your slides.
Want to recreate the effects shown in the video? This 3D text animation maker is free for you to try - just click the button below and get a trial version.
Those who prefer a more detailed guide can check out the below text animation tutorial and discover new creative ways of working with their captions. Scroll down the guide and you will get the hang of animated 3D text and will be able to bring stunning animations to your one-of-a-kind slideshows.
Use Pre-Designed Text Animation
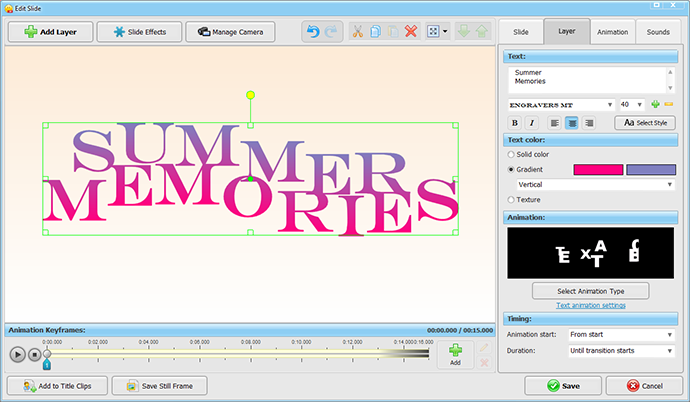
The application provides you with a large collection of animated text templates. Click on the Add Layer button and choose Animated Text from the drop-down list. It will open a window where you will see the Animation and Style tabs. Firstly, pick some animation type – like falling, zooming-in and rotating – then move to the set of styles. There you will see a selection of fonts and colors that you can apply to your future caption.
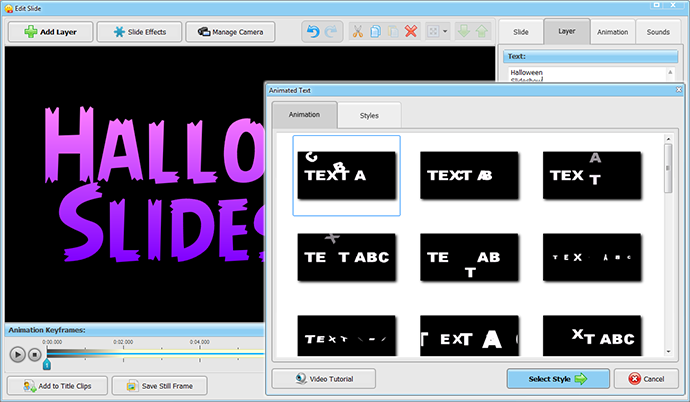
If you preview the chosen text animation, but do not like how it looks on your slide, you can always replace it with another one. Click on your text caption and push the Select Style or Select Animation Type button on the Layer tab.
Customize Your 3D Text Effects
While pre-designed settings are great for beginners, there is nothing like stunning effects made with your own hands. In this part of our text animation tutorial you will learn how to customize the chosen effect to your own liking. Imagine that you have selected some pre-designed text animation and want to slightly improve it. Click on the Text animation settings button and take a look at the main settings.
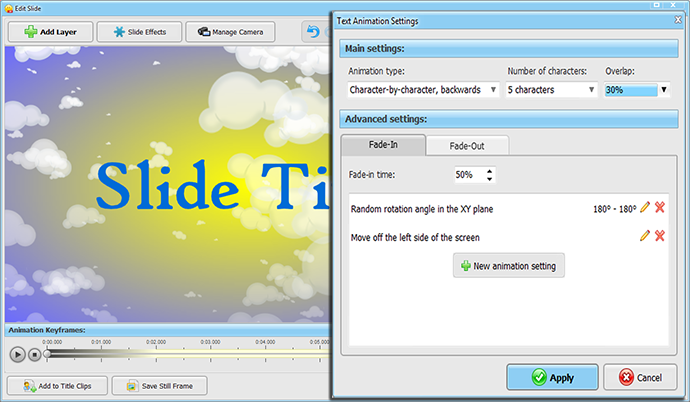
There you can decide on the number of characters, whether they should overlap and to what extent. For example, make words appear letter-by-letter backwards, forwards or randomly. Choose from 1 to 10 characters to appear on the screen at a time. This technique fades in one word after the other. The last task is to select the degree of overlapping, so that letters will cover each other partially or fully.
Get the Hang of Advanced Text Settings
The advanced settings are divided into Fade-In and Fade-Out subcategories. It means that you can choose how your text caption will appear and vanish from the slide. Animate text in your slideshow to give it visual effects, including rotation, movements, changes in color, size and even opacity. While adding a new animation setting, you should type in the minimum and maximum value to set the intensity of your animation.
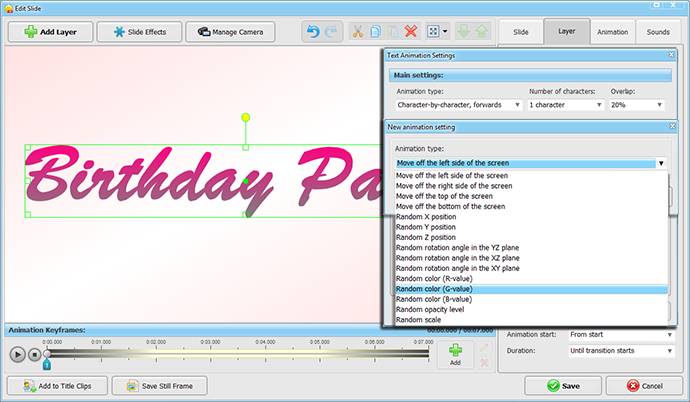
Use any text animation effect by itself or combine multiple effects. For instance, you can make a line of text fly in from the top while it slowly changes its color from yellow to red. View the list of animations on the slide to modify the order they play in, change advanced options or remove some animation. Remember that text animation works best when the caption plays center screen and your slide does not contain too much else.
Play with Text Timing
This part of the text animation tutorial will teach you how to control the effects timing. In the advanced settings you can set the fade-in and fade-out periods by changing the percentage value in the corresponding boxes. There is also a mini menu on the Layer tab, which enables you to play the chosen animation right from start, after a transition or a certain period of time. The duration of some text animation is also changeable and can last until a slide ends or a transition starts.
While reading this text animation tutorial, try creating your own slideshow. You can mix photos and video clips, add music, voice comments, and title slides. With proper text effects, your photo movies will become much more entertaining and interesting to watch. Follow these tips on working with animated text and showcase your photos with the best-possible titles and beautiful quotations!


Get started with SmartSHOW 3D!