How to Make Rolling Credits
Had a blast spending time with your friends or family? Got a bunch of photos and plan to turn them into a great movie? No doubt, it will be a great fun for your friends to watch it. Want to impress them even more? Then you should make movie credits that will feature everyone who starred in the video. Don’t know how to do that? Not a big deal, keep reading and learn how to make rolling credits in just a few clicks!
If you prefer a more detailed text guide, then check out the steps below:
Use the Pre-made Subtitle Clip
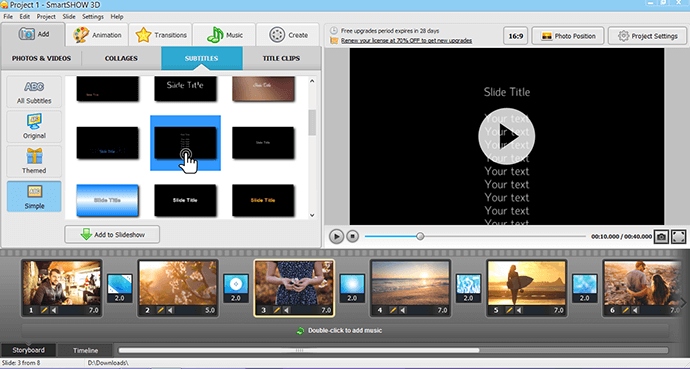
Sometimes you don’t have a spare minute to create the slide all by yourself, that’s why the best choice here is to use a ready-made template. Just go to Add > Subtitles and select the corresponding template from the Simple category. Drop it on the Storyboard and type in your text. That’s it – the rolling credits are ready.
Create a Custom Text Animation
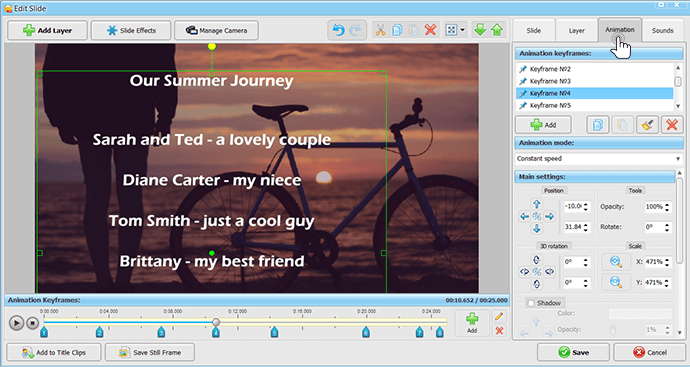
If you are feeling creative, you can make the credits manually and fine-tune the animation keyframes. First of all, add a simple text by clicking Add Layer > Text in the Edit Slide window. Then switch to Animation. Here you can see the animation timeline with the keyframes and their settings. Select the first keyframe and place the text below the bottom edge of the frame. You can set the certain Position for better precision.
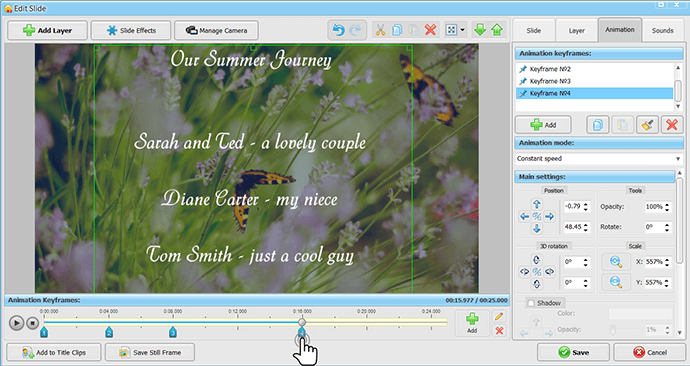
Now click Add to add the second keyframe and move the text up, placing it slightly above the edge. Keep adding keyframes until the text is behind the upper frame edge. Try to set equal intervals between the keyframes – this will make your animation smoother. Now click Play to see your scrolling credits in motion!
Precise Speed Control
Want to make your credits roll faster or slower at the end? It’s easy if you position the keyframes correctly. For example, set the second keyframe on 2 minutes. The animation will run slower if you drag and drop the keyframe onto the 3 minutes mark. Set it on 1 minute and you will get a faster animation. By placing the keyframes in the right order you can set a certain speed and mood for your credits.
Discover New Text Styles
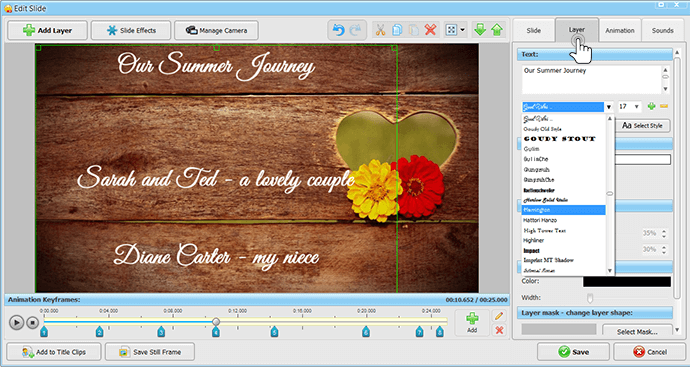
It’s no surprise that a standard text style can bore the viewers to death. Don’t hesitate to experiment! Type in your text and select a new font from the dropdown list on the right. You can use any font that you’ve installed in the system – no limits for your creativity. For instance, use a colored flourish font for the heading and a simple font for the major text. It will be easier to read the names of the featured people.
Spice Up Your Rolling Credits with Moving Objects
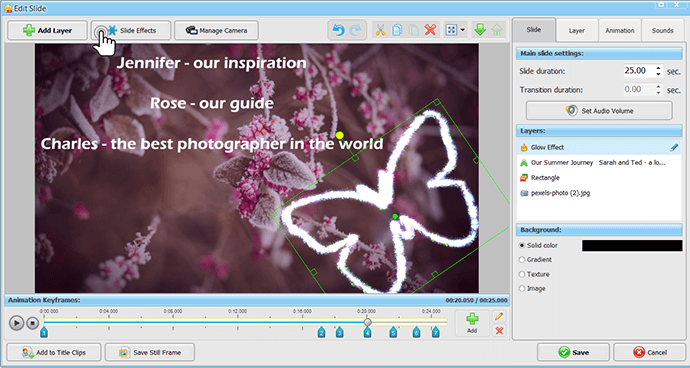
If you are inspired and want to leave your friends speechless, don’t forget to decorate your credits with different animations, GIF files, clipart and realistic slide effects. For example, use an animated Title clip as a base. Go to Add > Title Clips and insert it into your project. Open the Edit Slide window and change the animation in any way you want. In the end, you will get original credits that will finish your slideshow with style.
Now you are ready to make your own movie credits. However, be sure to check out the guide on how to make a movie from still images. With proper text effects, your photo movies will become much more entertaining and interesting to watch. Follow these tips on working with animated text and showcase your photos with the best-possible titles and beautiful quotations!
Get started with SmartSHOW 3D!


