How to Burn a Slideshow to DVD
Want to burn your photos and videos to a DVD and share them with your friends and family? You can bring it along to a party and show the photos mixed into a slideshow on a huge TV screen. Sounds fun? However, how to make a DVD slideshow without much fuss?
Obviously, you are going to need a slideshow making program that is capable of DVD burning. There are lots of them on the Internet, however, it’s hard to find one that can burn discs and mix images at the same time. In this article, we suggest 4 different ways to create a DVD slideshow with music, for both pro-level and newbie PC users.
So, grab a blank disc and let’s start!
Way 1. Burn Slideshow to DVD with SmartSHOW 3D
Imagine that you can not just throw your photos to a DVD, but also create a jaw-dropping slideshow and amaze all your friends. The dream has become real with SmartSHOW 3D. This slideshow maker program has all the necessary tools to make your project shine: 600 templates & effects, 500+ royalty free music tracks, 3D animations, realistic nature effects, voice comments and more. And, what’s more, you can check out the free trial version before burning a DVD.
Now, what steps should you take to burn slideshow to DVD with SmartSHOW 3D? Here they are:
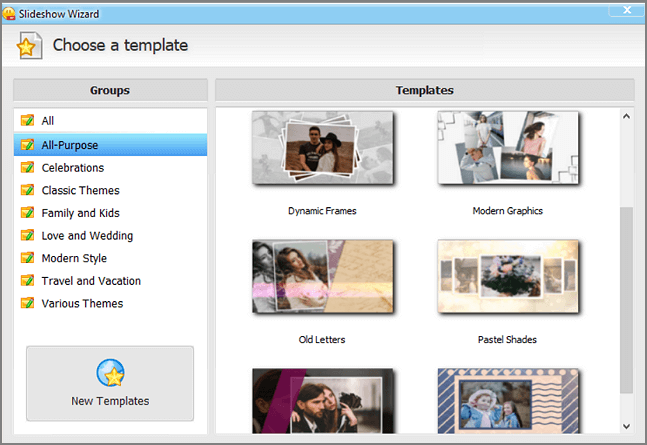
Step 1. Create a Draft of Your Slideshow
Start with the essential part of your slideshow – add pictures and videos. Drop them onto the timeline with a simple drag & drop. Then, spice it all up with collages: pick a premade template that fits the project style and drop in your images. They will be turned into collages automatically.
A soundtrack is a must in the slideshow world - that goes without saying. Open up the Music tab and add some vivid tunes. You can use music from the built-in collection or add your own songs. Don’t forget about voice comments: tell the viewers new details about your travel, fun facts about your family, etc. The records will be added to the second track on the Timeline.
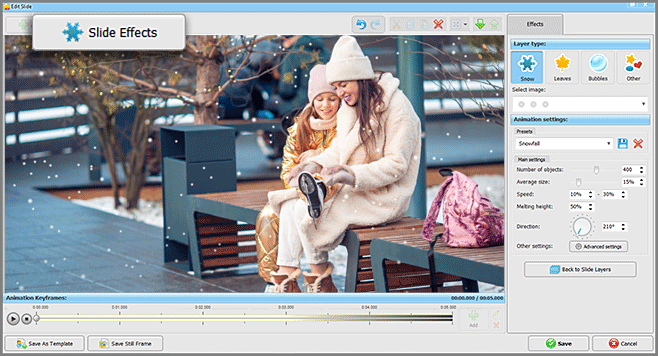
Step 2. Apply Stunning Effects & Titles
Play with various effects to make your project more impressive. Choose from more than 350 different transitions and animations, from soft gradients to dynamic 3D effects. Apply them with a simple drag & drop, then hit Play to preview the result.
SmartSHOW 3D offers a selection of title clips for any occasion: wedding, birthday, meeting, travel, etc. Just pick the one you like, enter the name and add to your slideshow. You can add rolling credits as well and showcase the names of the people who participated in the video.
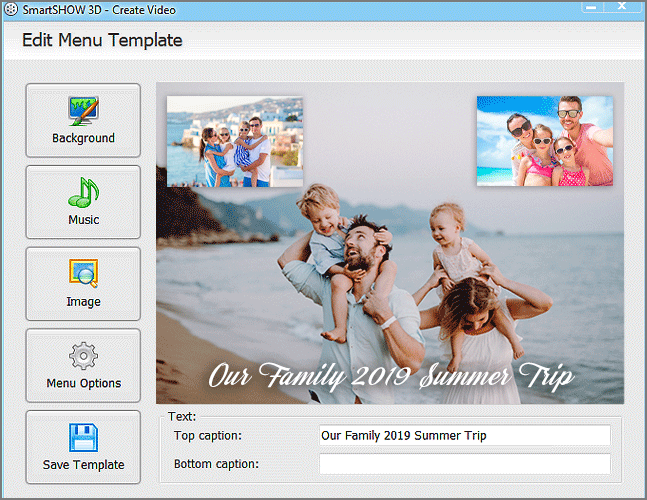
Step 3. Burn Your Slideshow to DVD
When you're done with editing, go to the Create tab and pick the Create DVD Slideshow option. Pick a menu layout and customize it as you wish: enter a title, add some background music and images. Select the No Menu option if you want to play the video straight away after inserting the disc into a DVD player.
Click Burn DVD. Choose the video type: pick DVD-PAL if you live in Europe, and select DVD-NTSC if you live in USA, Canada or Japan. This setting is very important for playing the disc on a DVD player or TV, otherwise, it won’t play. Decide what video quality you’d like to have, then hit the Start button and get ready to rumble!
Prefer a visual guide over text? Watch this video showing how you can create and burn a slideshow to DVD in SmartSHOW 3D:
How about following the steps above and making your own slideshow? All you need to do for diving into a slideshow world is just click the green button and get the free trial version of SmartSHOW 3D:
Now you know how to create a DVD slideshow with SmartSHOW 3D. It’s pretty easy and you don’t need to tinker away with different DVD settings. What’s more, it won’t be pictures simply changing one another, but an awesome slideshow that you made in just a few minutes.
Way 2. Make a DVD Slideshow in Windows Movie Maker
Do you know that you have a slideshow maker built right into your Windows system? For many years, Windows provided a free program called Movie Maker. Although it’s discontinued now, you can still find this software in Windows 7, Vista, XP. Alternatively, you can use its successor - Windows Video Editor.
Windows Movie Maker (or Video Editor) has a very simple interface. The program is easy to use for everyone, that’s why you don’t need any guides to navigate around it. You can add videos, images, record voice comments and apply simple effects.
So, how to start making a DVD slideshow in Windows Movie Maker?
Step 1. Create a New Project
Choose New Video Project. Then click the Add button and choose a place from where you want to import content: from your PC, Collection or Internet. You can add both pictures and video clips.
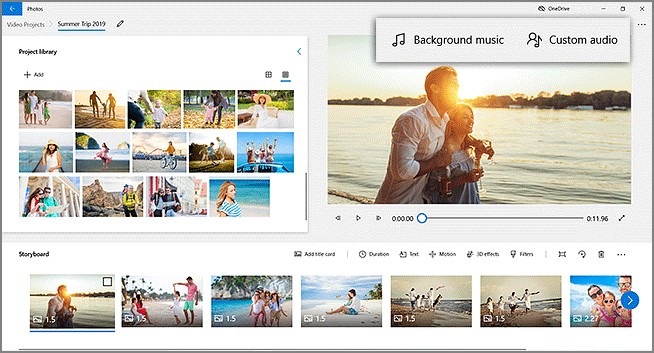
Now drag and drop the chosen files to the storyboard. You can choose which ones you want to import by marking them with a tick. Arrange the photos to your taste.
Step 2. Add Visual Effects & Transitions
Choose a slide on the storyboard and click Visual Effects in the top bar. Pick from various presets: Artistic, Black&White, Motion&Fades, Mirror, etc. Apply the one you like to one of your photos. Click Play to see the result.
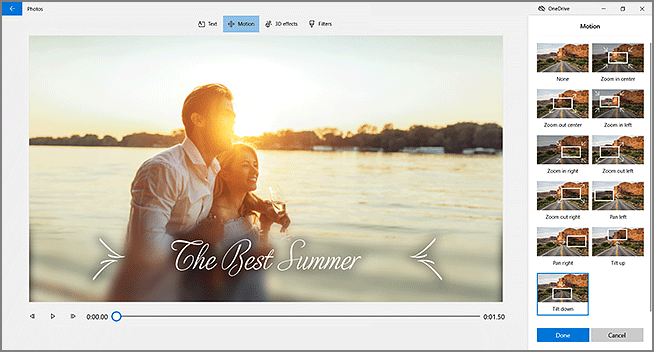
Glue your slides with transitions. In Windows Movie Maker, they are called Animations. If you want, you can apply the same transition to all slides.
Step 3. Create Your DVD video
Satisfied with the result? Click Save Movie in the Home tab. Select For HD Display and choose a save location. Click "Save" to export the project in the selected video format.
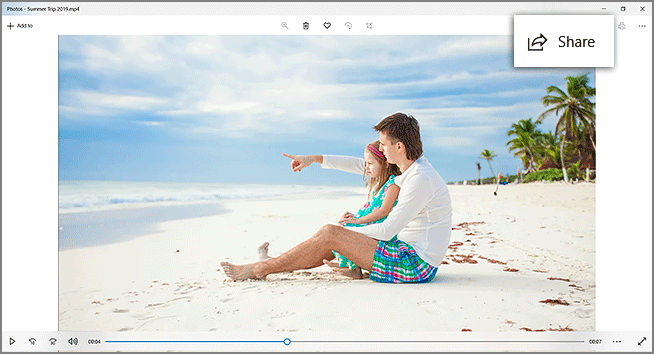
Open the folder containing your slideshow. Insert a blank disc into the PC drive. Now right-click the video file and pick Send to. Choose the blank disc and wait while the system is doing its job - the burning process may take a minute or two.
That’s how you make a DVD slideshow with Windows Movie Maker. The steps sound pretty simple. However, since the software is discontinued and lacks editing features, you’d better switch to a different burning program from our list.
Way 3. Create a DVD Slideshow With PowerPoint
Want to make a photo presentation and share it with your colleagues or classmates by giving them a DVD? Take a look at PowerPoint.
Powerpoint is one of the most popular programs for creating slideshows, and it comes with Microsoft Office Suite. So, if you have Office installed on your Windows system, you can create a presentation for free.
Now, how to burn your PowerPoint photo slideshow to DVD?
Step 1. Create Your Presentation
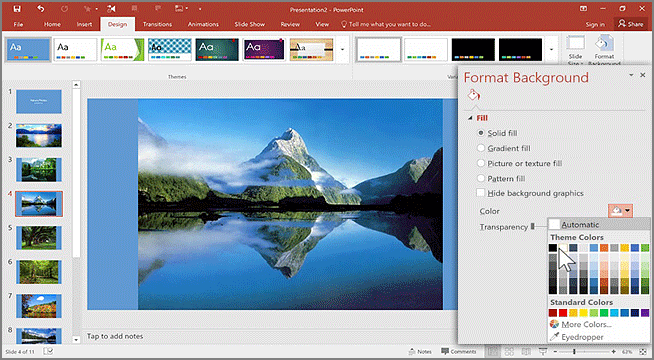
Start PowerPoint and create a new project. Pick the template that corresponds to your project theme. Then add photos and videos to the slides. You can tweak the chosen style quite easily: change the background color, add different captions, create simple collages, etc. If you want to apply the new style to all slides, just click Apply to All at the right bottom of your screen.
Step 2. Prepare Files For Burning
When you finished creating the presentation, go to File > Save As and save your slideshow. Now insert a blank DVD into the DVD-ROM drive. Open My PC, then right-click the DVD and click Open. Minimize the window. Navigate to your presentation file, then right-click it and choose Copy. Paste it into the disc window.
Step 3. Burn Your Presentation to DVD
Click the Burn button in the top bar. The system will ask you how you want to use the disc. Choose “With a CD/DVD player”. Name this disc and change the burning options if needed. Click Next and wait for the presentation to get burned on DVD. It may take a minute or two.
This is one of the easiest ways to create and burn a slideshow to a DVD, provided you have Microsoft Office Suite installed. However, if you don’t, it’s better to pick some other software to create a slideshow.
Way 4. Get Your Slideshow to DVD With Windows Media Center
Windows Media Center is an application for playing movies and music on your Windows 7 system. Additionally, you can record TV shows and burn movies to DVD with its help. So, you’re still running Windows 7? Then you have a free tool to transfer your slideshow to a disc. Let’s see how you can use it.
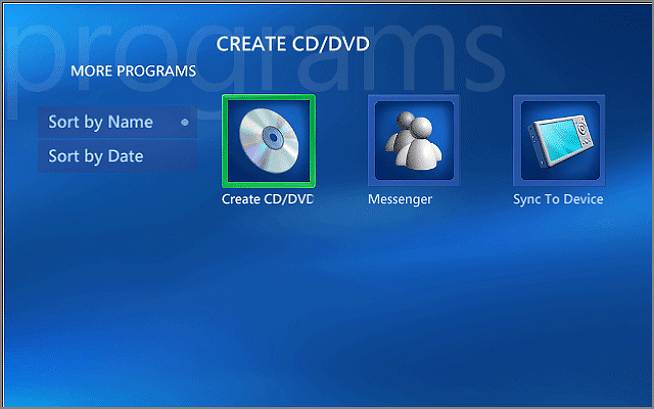
Step 1. Start Windows Media Center
Go to Start > All Programs, find and run Windows Media Center. The main window will open.
Step 2. Add Your Slideshow to Disc
Insert a blank disc into the drive. The app will ask you about the purpose of this disc. Select DVD Slide Show. Now give your disc a name.
Step 3. Burn the DVD Disc
Select the presentation you want to burn (you can quickly create one beforehand with SmartSHOW 3D or PowerPoint). Check the burning settings and tweak them if needed. Then click Yes to burn the disc.
As you can see, it’s quite easy to burn a presentation to a disc with Windows Media Center. However, you have to create the slideshow with some other software before burning it. That’s why we suggest taking a look at other programs that let you create and burn slideshows to discs.
Make Your Choice
Now you know how to put a slideshow on a DVD: 4 different ways to try out. Before rushing to the actual task, read the article once again and think about your needs. Keep them in mind when making the final decision.
Want to make a video slideshow and burn it to a disc instantly, without switching between softwares? Then go with SmartSHOW 3D. Do you use Windows system and need a free way to get your presentation to DVD? Pick Windows Movie Maker.
If you want to make a slideshow for business or study purposes, start Microsoft Office with PowerPoint. Finally, if you are still using Windows 7, you probably have Windows Media Center installed. That’s another free way to burn your slideshow to DVD.
Whatever your choice will be, we hope our guide will be helpful to you on your journey to a cool slideshow.


Get started with SmartSHOW 3D!