Created an engaging slideshow with a perfect combination of animation effects and decorations? Save it as a template! This way, you will be able to use it any time for your future projects. All you’ll need to do is to pick a photo set for your new slideshow. In this guide, we’ll tell you how to save a slideshow template.
How to Create a Slideshow Template
Let’s find out what a slideshow template is. Basically, it’s a ‘shell’ made of special effects, animations, transitions, and embellishments. Also, the program will save your videos, texts, cliparts, backgrounds, and titles. The JPEG images are to be replaced. The software searches the JPEG files analyzing all the media that you used (photos, frames, cliparts etc.).
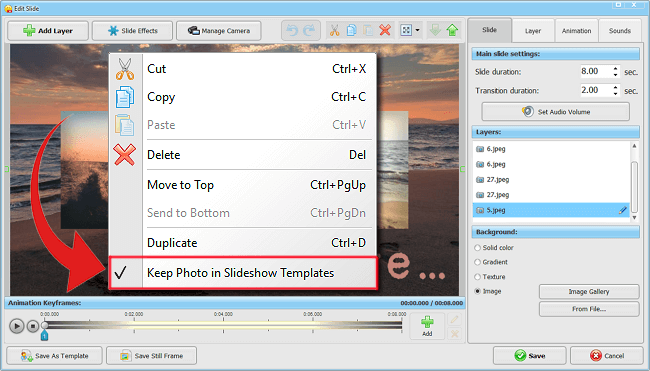
If you used some photos as slide backgrounds and want to save them, open the slide editor, select the photo in the Slide tab, right-click it and select Keep Photo in Slideshow Templates.
To save your slideshow as a template, follow 3 simple steps:
- 1. When your slideshow is ready, open the File menu at the top of the main program window and select Save Project as Slideshow Template.
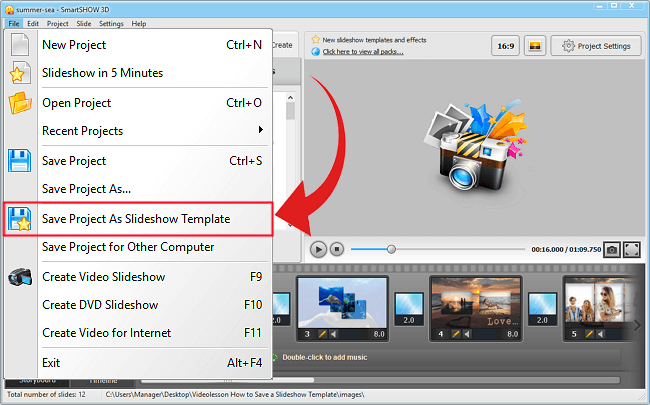 Save your slideshow project as a template
- 2. In the dialogue box that shows up, choose your template preview by clicking the arrows and click Next.
 Select a slide as your template preview
- 3. Type your template name in the field. If you have dedicated intro and final slides, leave both boxes checked. This option is convenient for creating a few themed slideshows.
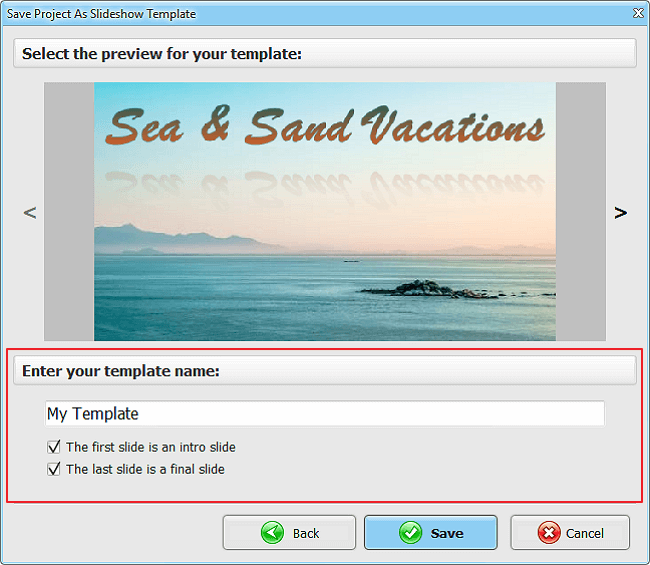 Give a title to your slideshow template
How to Use a Slideshow Template
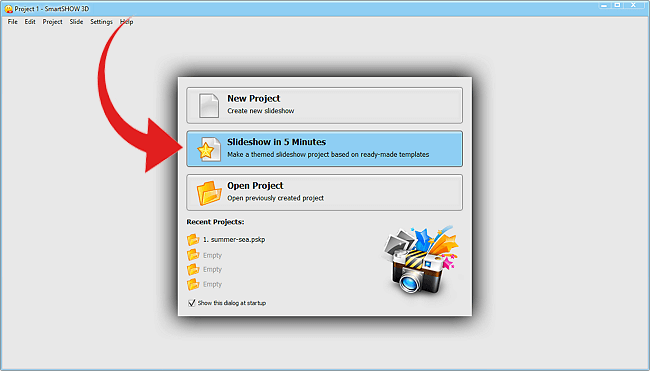
To create a new slideshow with the help of your template, run the program and click Slideshow in 5 Minutes.
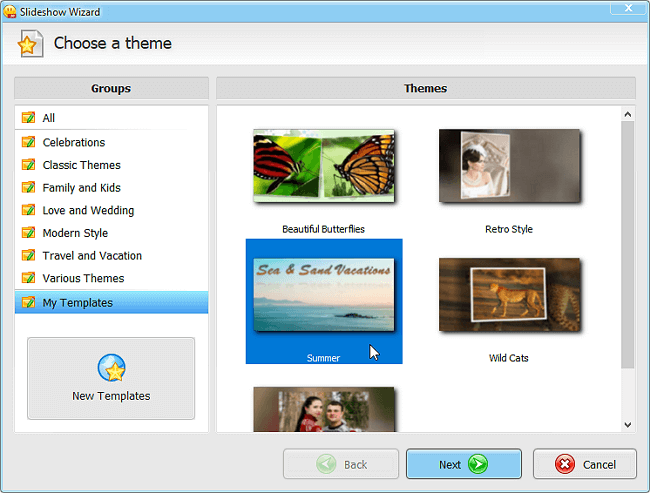
In the Slideshow Wizard, click My Templates and find your slideshow template. Select it and click Next.
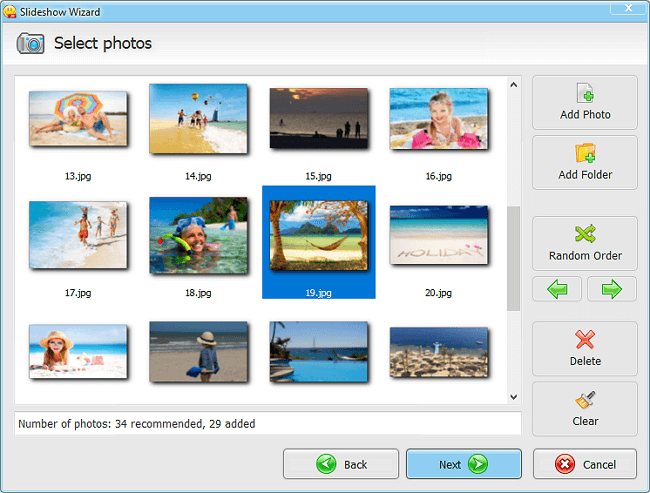
Note that SmartSHOW 3D shows you the recommended and added number of photos according to the number of JPEG files in your template. You can add more or fewer images. If the added number of photos exceeds the recommended one, the software will apply the effects repeatedly. For example, if there are 34 pictures in your slideshow template and you added 36, the program will start repeating the effects from the 35th slide.
After that, SmartSHOW 3D suggests that you add a suitable tune to your new project. You can keep the template music, apply a new track or just skip this action. Cut the tune and adjust its volume and faders if needed.
Click Done and wait till the software inserts new JPEG files into your slideshow template. In a few seconds you can edit the slideshow to improve it and create a video for your computer, burn it to DVD and share it with your friends and relatives!
Want to make stunning photo movies with your own pictures? That's as simple as ABC with SmartSHOW 3D software!
Compatible with
Windows 11, 10, 8, 7

Get started with SmartSHOW 3D!