Types of Slide Animation Effects
Are you looking for new ways to add dazzle to your slideshow projects? That’s when different kinds of slide animation effects will come handy. The pro-level slideshow software such as SmartSHOW 3D provides a wide range of animation effects with flexible settings. Read on to learn how keyframes and values are used to make magic happen on the screen.
How to Add Slide Animation Effects?
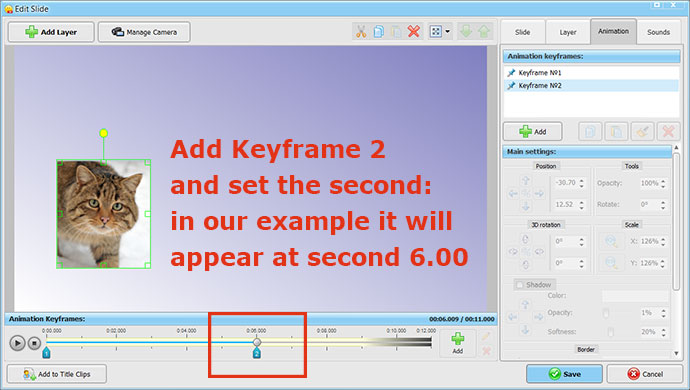
Choose a slide you’ll be working with. This can be a slide with the photo or a blank slide – you can add photos and other content in the slide editor. Click Edit Slide to open the slide editor. If this is a blank slide (like in our video lesson), click Add Layer and add a photo. Now that the layer with the photo is highlighted (with a green border around), switch to the Animation tab. You’ll see Keyframe 1 already there – this is the starting position of the selected layer. Click the Add button to add Keyframe 2. Now look at the timeline under the slide preview window – you’ll see a new blue marker marked “2” there. That’s the marker for Keyframe 2. Move it to the exact second when you want Keyframe 2 to appear. After that, it’s time to try different animation settings.
What Kind of Animation Settings Are There?
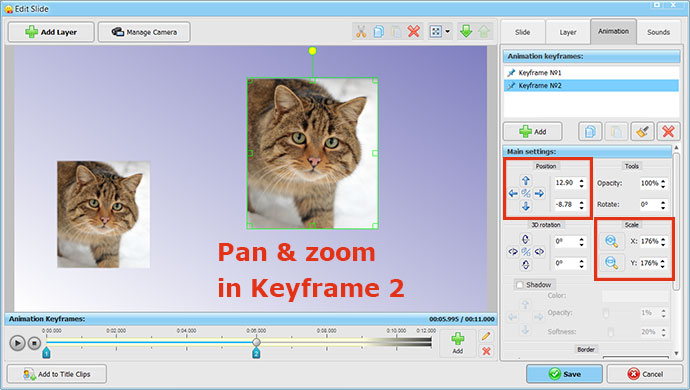
First, there’s rather common pan & zoom – the simplest setting that will bring still images to life. To add panoramic motion, either drag the object to a new position using the mouse or use the arrows under the list of keyframes. Same goes for zoom – resize the object with drag & drop, or change the Scale values in the right panel. Having set the desired values for Keyframe 2, play the preview and watch the photo come in motion!
Next, there are rotation and 3D rotation settings. If you change the Rotation angle, the layer will rotate clockwise (with the angle set from 0 to -360) or counterclockwise (angle set from 0 to 360). This kind of rotation happens on the plane. If you choose to apply 3D rotation, the object will rotate in space - in all the three dimensions. Use the buttons with the hints or enter the angles manually.
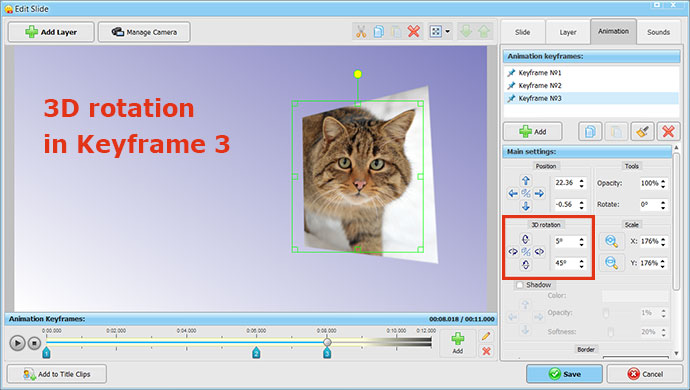
Combining pan & zoom, simple rotation and 3D rotation, you can create fancy paths for the object on the slide. When you practice a bit and feel more comfortable in creating slide animation effects, try adding several photos on the same slide to make a slideshow with animated collages!
How Can You Enhance Animation?
Depending on your slideshow theme and pace, you might prefer smooth or fast motion. Have a look at different animation modes in SmartSHOW 3D. Select the object and switch to the Layer tab. You’ll find Animation Mode at the bottom of the right panel. The default mode is Constant speed. You can change it to Smooth, Speed up / Slow down, or try original Push out and Bounce off modes. Each is great for a certain purpose.
Besides making layers move, you can play with transparency settings and with the object’s shape and edges. The latter is done with the help of masks which deserve special attention. The masks collection is available on the Layer tab. Click the Select Mask button and pick one of the masks. When the mask is applied, the photo will change its shape. You can use masks merely for decoration purposes or take a further step!
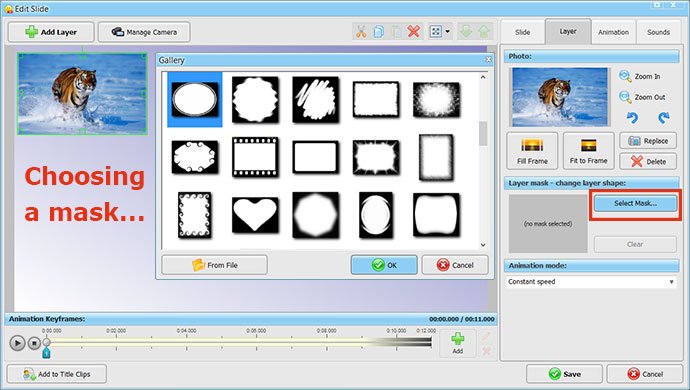
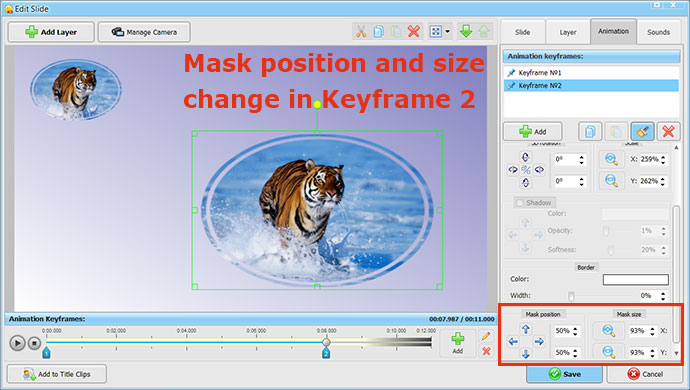
Masks can be used to create impressive animation effects. Open the Animaton tab and find Mask position and Mask size settings (you may need to scroll down the right panel). If you enter different settings for Keyframe 1 and 2 here, the mask will move, revealing certain parts of the photo. If you apply certain masks to a text layer and fine-tune the mask position and size values, you can make lines of text gradually appear or disappear from the slide. Watch the video lesson above to see it in action.
Playing with slide animation effects in SmartSHOW 3D and creating your own fancy effects is a lot of fun and lets you create breathtaking photo movies. Try it yourself!
Get started with SmartSHOW 3D!


