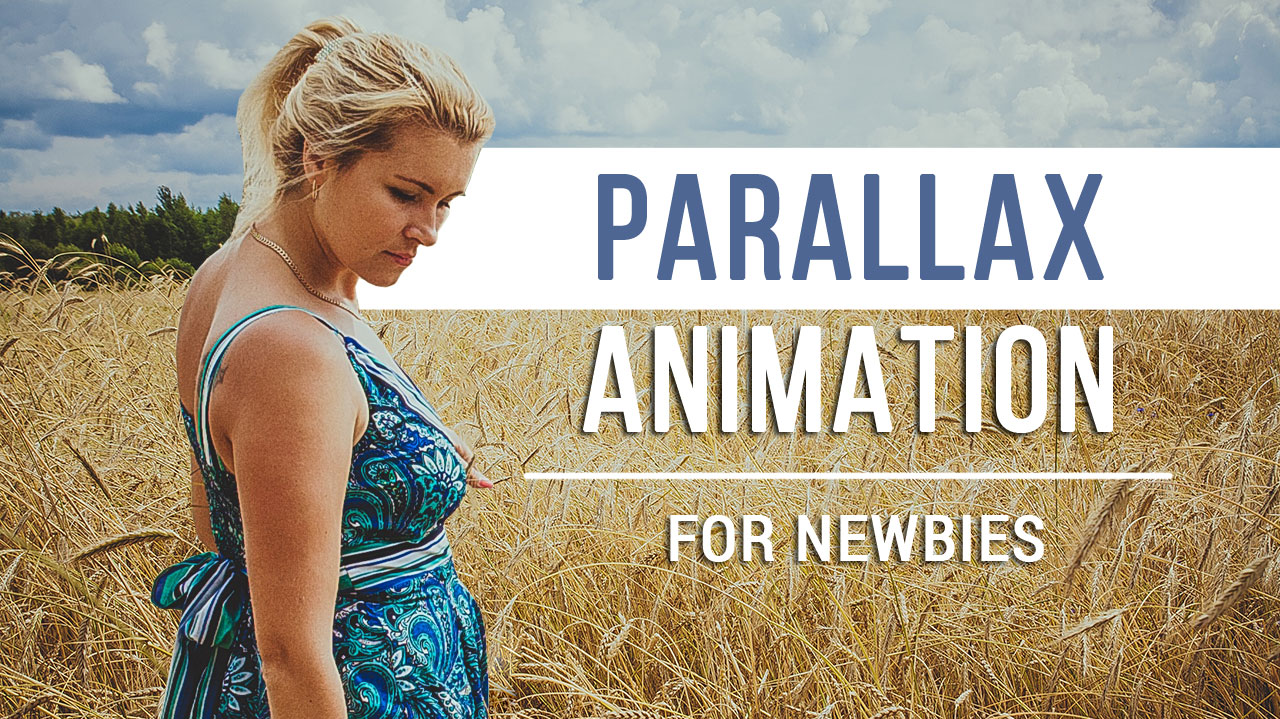
Best Photo Animation Software for Newbies
Want to treat your viewers to a slideshow made with your own hands? They won’t appreciate a simple carousel of still images coming one after another. The solution is to funk up your creative projects with special effects using powerful photo animation software.
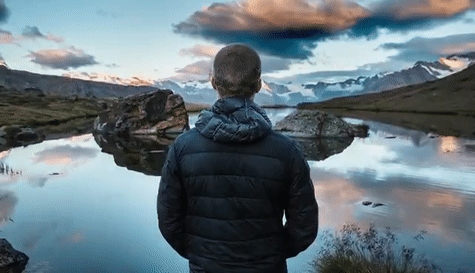
Take a look at SmartSHOW 3D. This easy-to-use program offers you a wide range of animation and transition effects, artistic presets and highlights to better showcase the chosen photos. Here's an example of cool animation you can make:

Searching for software to animate still photos with ease? Try SmartSHOW 3D for free and create stunning slideshows in mere minutes:
Now that you've got the tool, time to switch to theory and practice. Keep reading this guide and below you’ll find five different types of photo animation to use in your slideshows.
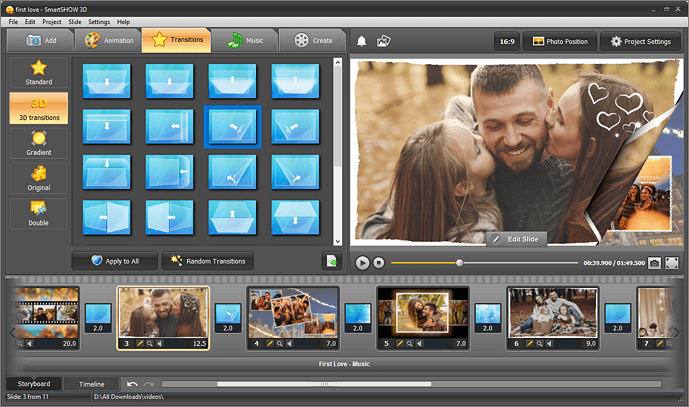
📹 Transition Effects
This picture animation software comes with 150+ transition effects divided into five themed groups - Simple, 3D, Gradient, Original and Other. You can connect each photo in your slideshow using different types of transitions from a simple fade-in to a 3D page roll. What’s more, Transition Wizard, the program add-on, lets you create your own transition effects and apply them separately or to all the photos at once. Thanks to various transitions, you’ll be able to add more dynamics to your picture movies and create the right atmosphere.
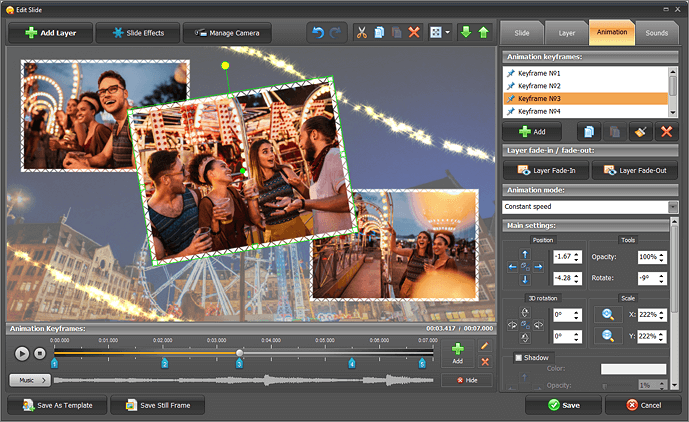
📹 Slide Animation Effects
Move to the Animation tab to browse through the collection of ready-made effects. With their help, you’ll be able to make your photos appear from a blurred background, fly over the slide or move like shots in a film strip. To create your own animation from scratch, open the slide editor and add a number of keyframes capturing each movement of pictures on the slide. Change the size of your images, rotate them in 3D, apply funky masks and play with opacity settings.
📹 3D Camera Animation
The best image animation software also lets you increase the impact of your visual storytelling through camera moves. Move the camera eye across the slide to better show the whole picture or zoom in only the chosen parts and objects that are of most interest to the audience. Using the 3D Camera tool, you can make all the layers move as a single entity and funk up the animation you’ve already applied to them.

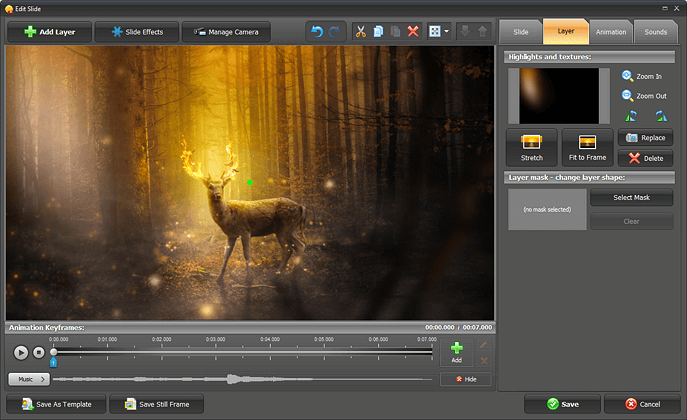
📹 Highlights, Glows & Flares
Want to accentuate certain parts of your slide or only one photo in a video collage? SmartSHOW 3D offers a vast gallery of original highlights, colored and vintage textures. Just pick a suitable glow effect and add it to the slide. For a more stunning result, try adding glows and flares to different shapes that you can find in the large built-in collection. Keep in mind that the effect will be better seen on a dark background.
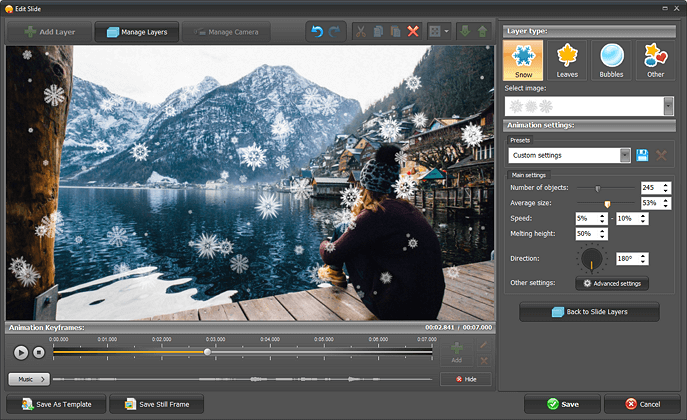
📹 Nature Photo Effects
Using this software for picture animation, you can recreate snowflakes, falling leaves, rain drops, bubbles, glowing fire, thick fog and other so-called nature effects. To achieve a truly realistic look, change the type of these images, their number, size, direction and speed. As a result, your animated slide will resemble a window view.
Can’t wait to try these effects in your slideshows? Check out other tutorials on how to create an animated slideshow or read this guide till the end and learn the secrets of parallax animation.
Need user-friendly but powerful software to animate still photos? Check out SmartSHOW 3D - download the free trial version below:
With this program, you can create one of the most amazing and eye-catching effects - parallax animation. Here's a step-by-step guide on making this type of animation:
How to Create a Simple Parallax Animation
One of the most popular and coolest animated effects is three-dimensional parallax. This technique involves multiple layers all moving at different speeds and in different directions with respect to one central point. It’s an optical illusion when the main subject seems to be moving apart from its background - this creates a rather immersive effect. A parallax animation can be large or small, subtle or extremely pronounced, and works in a variety of ways.
Here’s what a parallax animation can do to funk up your photo projects:
- Visually stimulate users and create a strong impression
- Tell a story using spatial relationships and movement
- Communicate personality or tone
- Contribute to the viewer’s delight and entertainment
Here, we’re going to create a simple parallax animation using a rich toolset available in SmartSHOW 3D. Follow all the steps below and add more depth to the photos in your slideshows.
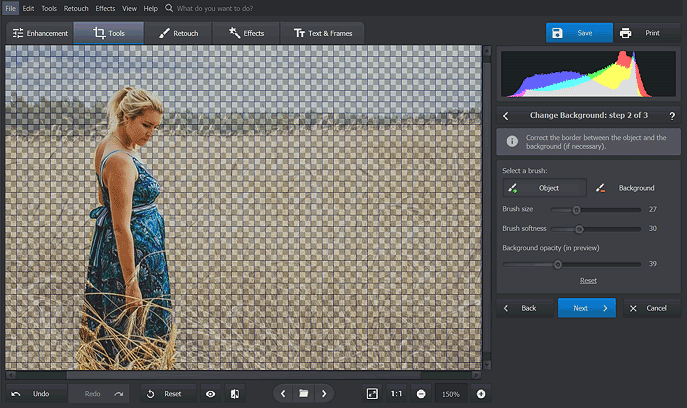
Step 1 - Prepare the Foreground Image
First, you need to cut the main subject from its background. This editing is easy to complete in PhotoWorks software. In the search bar, type in Change Background. Use the green brush to select the desired object, then mark the background with the red one. Once the image is separated, save it as PNG with a transparent background to preserve all of its settings.
Step 2 - Position the New Layer on the Slide
To start working on your parallax effect, you’ll need some still image animation software. In our case, it’s SmartSHOW 3D. Launch the program and add the original photo to the Storyboard. Next, click Edit Slide > Add Layer and put the edited image with a transparent background over the initial one. The trick is to position the picture you added over the figure in the original photo so that the background figure will be unseen.
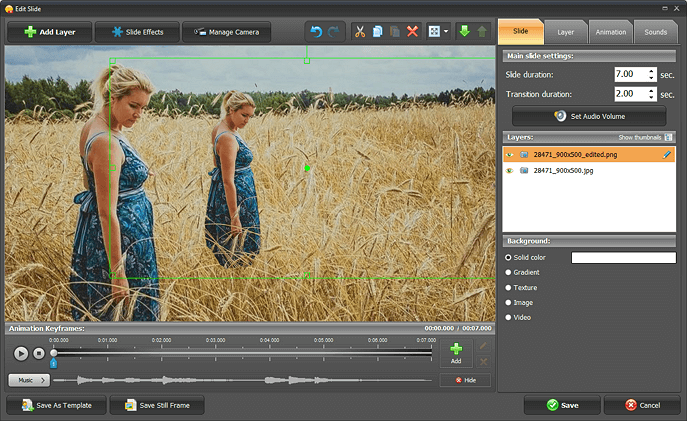
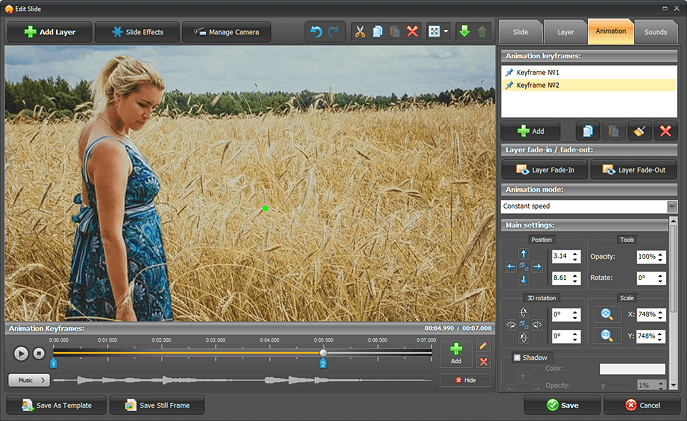
Step 3 - Animate the Foreground Picture
Pick the second photo layer and switch to the Animation tab. In a new keyframe, increase the photo size and move it on the slide using the Position arrows on the sidebar. Once again, it’s important to place this large image over the background layer so that the viewer will see these two objects as a single one. Don’t forget to move the keyframe closer to end of the timeline to let the viewer take a good look at the animation effect.
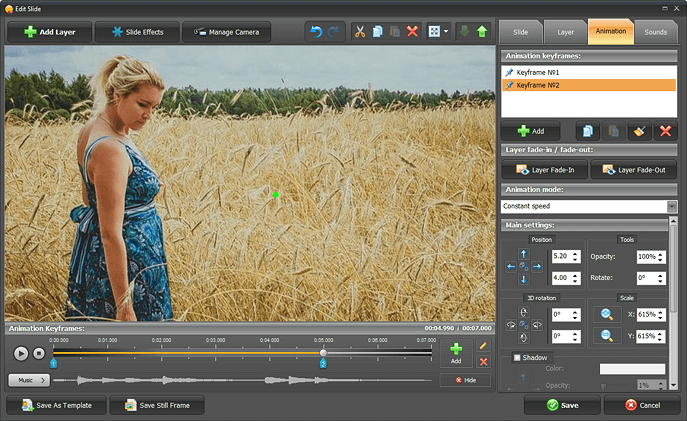
Step 4 - Now Animate the Background Image
Get back to the Slide tab, switch to the background image and slightly zoom it in. Here we recommend that you add a new keyframe one second after the last keyframe for the previous photo layer so that these two effects won’t happen at the same time. To make your parallax animation truly immersive, increase the size of the background picture in Keyframe #2. Make sure that after all the changes the two subjects still perfectly overlay.
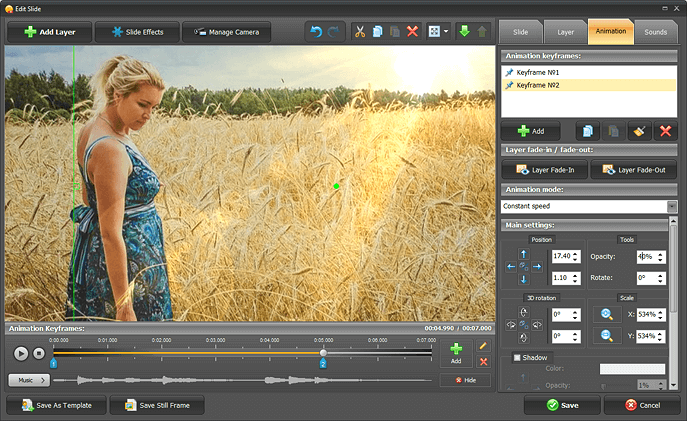
Step 5 - Spice Up Your Animation with Highlights
As you can see, it’s quite easy to create animation from images but you can further improve your parallax effect using highlights imitating sun rays. Click Add Layer > Highlights and Textures and choose an effect to your own liking. While on the Slide tab, use the green arrows on the toolbar to send this highlight layer backwards and put it between two photos. Switch to the Animation tab. In Keyframe #1, reduce the highlight opacity and increase its size. Add Keyframe #2 and slightly move the mask on the slide for a more immersive effect.
So, how do you like the idea of a simple parallax effect for your photo projects? With SmartSHOW 3D, you can easily zoom in and out pictures on your slides, rotate them in any possible manner, show them in a favorable light using 3D camera or blend your pictures into cinemagraphs (stunning live photographs). Download this photo animation software for PC and start working on your first project today!


Get started now with SmartSHOW 3D!