How to Create an Animated Photo Album
Tired of regular slideshows where one photo comes after another? How about making a digital photo album with page turn effect? That way you'll be able to present your pictures in a new way and even give them a retro look. All you need is a proper photo slideshow maker for a PC to make custom effects and apply them to the chosen images. Watch the video to see what a gorgeous album-style slideshow you can create in SmartSHOW 3D.

Like the page turn animation shown in the video? You can easily create something like this, too! Start with downloading SmartSHOW 3D. Use the button below to try this photo album animation software for free:
Now that you have powerful software at hand, let's jump to the tutorial. Read it till the end to reveal all the secrets of making a digital photo album that will flip like a real one.
📖 Step 1 - Add Background to Your Album
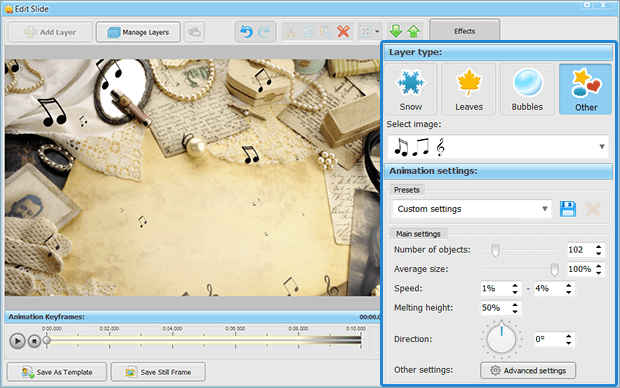
For a start, decide what kind of background you’d like to use for your future photo album. Ideally, this image should associate with old times and convey a retro effect. It can be a collage of vintage pictures or some peculiar pattern. Here we’ve picked the image of antique things scattered over the table surface. That way the digital photo album looks as if it lies on the table. Click Slide Effects to adorn the background with vintage cliparts (for example, musical scales) and arrange them on the slide. With the Animation settings, you’ll be able to control the effect speed and direction.
📖 Step 2 - Create the Cover with Page Flip Effect
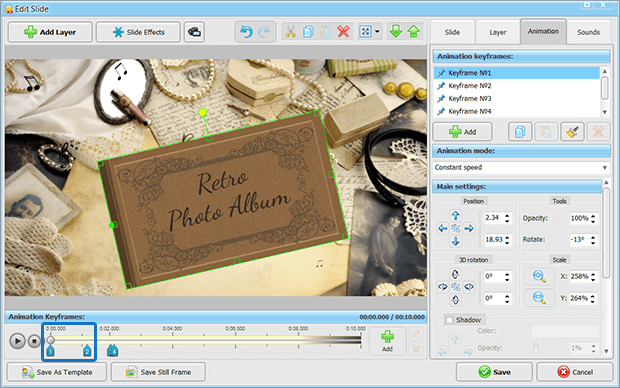
Add the cover image you’ve prepared to the Storyboard, click Edit Slide and position the image on the screen. Resize the picture so that the name of your album is clearly seen. Now let’s work on its animation. Click on the cover layer and switch to the Animation tab. There you’ll need to add four keyframes.
♦️ To create a smooth animation effect, don’t change the default settings of Keyframe #1 and Keyframe #2.
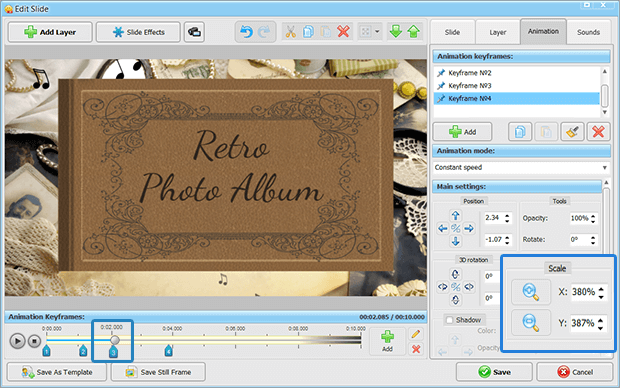
♦️ Make your cover image bigger and position it in the slide center in Keyframe #3.
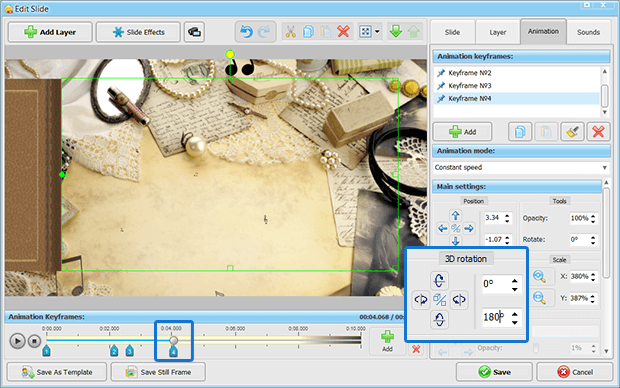
♦️ Add a 180° 3D rotation to the left in Keyframe #4.
If you’ve decided to make an eye-catching intro for your slideshow or digital photo album, think over its style and animation. Even the font you’ve chosen can change the atmosphere of you video. For example, italic letters will be great for a vintage slideshow, while a techno font will better fit into a modern project.
📖 Step 3 - Set the Layer for the First Page
To make a seamless page flip animation, it’s important to synchronize the movements of the album cover and the layers of the first page. After the cover has opened, the audience sees the starting page with some photo. The trick is to hide these layers while the cover is in motion. Set the opacity of the page background and photo at 100% in Keyframe #1 and Keyframe #2. Place Keyframe #3 closer to the previous ones and make the layers 100% visible again.
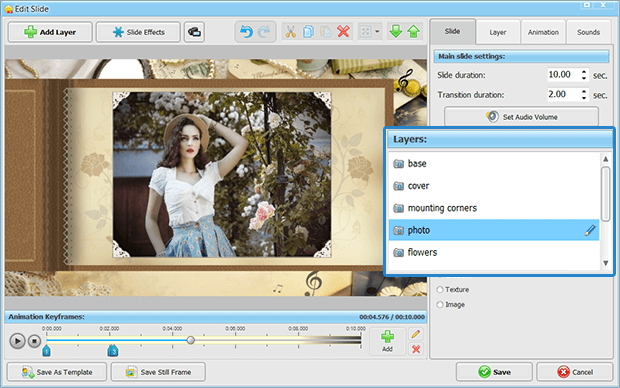
Position one or more vintage photos on the first page. You can also decorate your images to ‘stick’ them into the album. Find some picture mounting corners and place this clipart over your photo. That way a digital album page will look like the one opened in a real paper book.

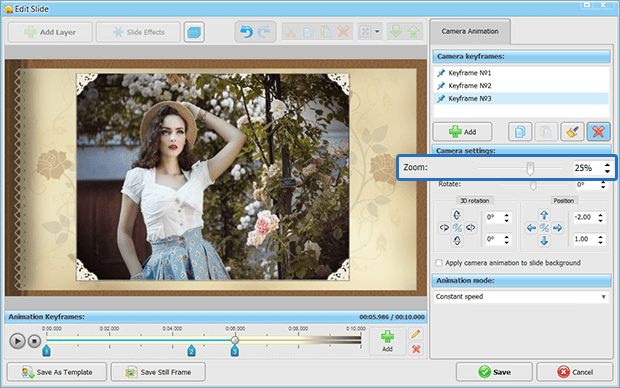
📖 Step 4 - Bring the First Page Closer to the Audience
Hit the Manage Camera button to increase the size of your album page and bring the photo closer to the audience. You’ll need to add more keyframes to the page background and photo layers. Without changing the settings of Keyframe #1 and Keyframe #2 set Zoom at 25% in Keyframe #3. Place the keyframes on the timeline so that the album page zooms in after the cover is fully opened.
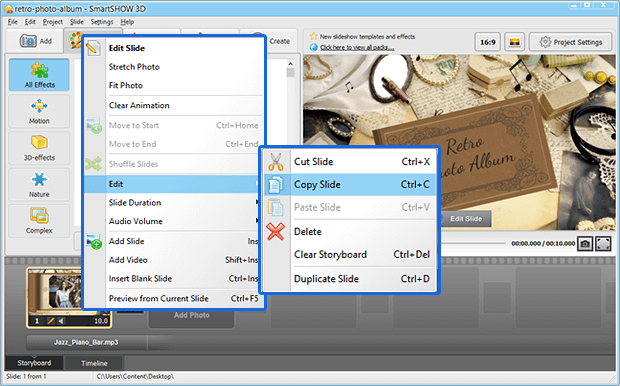
📖 Step 5 - Make More Pages of Your Album
Save all the changes you’ve made to the first slide. On the menu bar click Edit and copy your cover slide to use it as a base for other album pages. You can also click on the desired slide with the right mouse button and click Edit > Copy Slide in the pop-up box.
♦️ Remove the animation you’ve created for the cover. In Keyframe #1 add a 180° 3D rotation to the left. That way the cover will be opened when it comes to the second slide.
♦️ Pick the previous photo on the slide and move to the Layer tab. Click Replace and insert a new picture.
♦️ Don’t forget to delete the animation for the page background and photo layers. Zoom in these layers in Keyframe #1 at 25%.
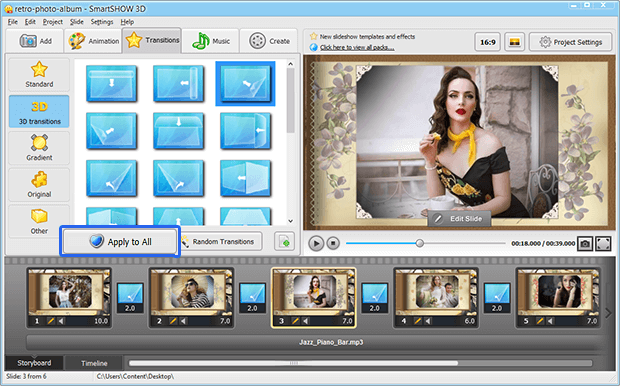
📖 Step 6 - Use Transitions to Turn Album Pages
When you’ve created as many pages as you need it’s time to add suitable transition effects. Switch to the Transitions tab and open the group of 3D transitions. There you’ll find different types of page turning effects. Pick the one where the page opens to the left side as if it was turned with an invisible hand. Click Apply to All and watch your slides flip one after another.
📖 Step 7 - Animate the Cover Closing
Have you showcased all the photos in your digital album? Close the book after the last photo is shown on the slide. Repeat all the actions you did to imitate the opening of the album cover. This time Keyframe #1 and Keyframe #2 of the corresponding layer are rotated at 180° to the left. Switch to Keyframe #3 and set the 3D rotation at 0°. As a result, the cover of your photo album will close.

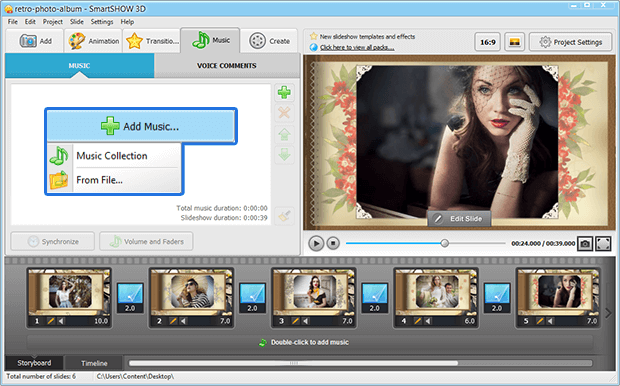
📖 Step 8 - Funk Up Your Album with Music
A digital photo album is much cooler than a paper one since you can jazz it up with music. Take a look at the Storyboard. There you can also add some music. Double-click on the Music bar to pick a tune from the program library or upload your favorite music from the computer. Preview your vintage slideshow to make sure everything works as it should.
Music is an important element of your photo story. By adding the right tune, you can easily turn a regular slideshow into a music box with moving images or a musical greeting card.
Get started with SmartSHOW 3D and you’ll be able to create this animated photo album yourself. Give your modern pictures a retro look and combine them into an awesome digital photo book!


Start now with SmartSHOW 3D!