How to Make a Slideshow With Voiceover

Need to create a slideshow with voiceover for your job or studies? Just want to showcase photos from your recent travels and share your trip impressions in the background? In any case, this task doesn’t seem easy. Just think: you need to compile pictures, record your voice and synchronize it with the video, add fade-ins, etc.
How to make a slideshow with voiceover and not break a sweat? Breathe out: you have the answer now. Just continue reading to discover a detailed step-by-step guide with tips and advice on the software. Let’s start with the key things to keep in mind when you make a slideshow with voice comments.
5 Tips For a Cool Voiceover Slideshow
- First, you need a microphone: stand-alone or built into your computer. If the device doesn’t have any pop filter, make sure it doesn’t catch any additional noises. Find a small room, turn off fans with an air-conditioning system and shut the door. Adjust the volume level so your voice will be easy to hear.
- Think about how you will record the speech. You can record it piece by piece or record voice comments for the whole slideshow at once.
- Prepare yourself for voice recording. Write a script or at least some key sentences for your speech. Before hitting the Record button, practice a bit: read the script aloud a few times and make a couple of test recordings. Don’t forget about pauses, intonation and clarity.
- Stand up while recording your voice. This posture opens up your chest, so it’ll be easier for you to read and control your breathing. As a result, you’ll get more confident and avoid unnecessary pauses.
- Prepare the photos for your video. Don’t just copy the whole Pictures folder - look through your images and take 30-50 photos corresponding to your topic. Try taking different images: landscapes, group shots, close-ups, portraits, etc.
- Find suitable software for making a video slideshow with voiceover. Most people suggest using Powerpoint or Google Slides, but they have a pretty limited toolkit. If you want to fine-tune the sound and create a pro-looking video, you’d better try a different program. For example, SmartSHOW 3D.
- ✔ create videos in 5 minutes using pre-made templates
- ✔ use 500+ royalty-free music tracks of different genres
- ✔ fine-tune the sound for voice comments and music
- ✔ apply 500+ effects: from classic fades to 3D rotations
- ✔ export your projects in 30+ video formats
Get this powerful slideshow software and start creating stunning presentations with voiceover right now!
How to Make a Voiceover Slideshow
Now when you are fully prepared, let’s see how to make a video with pictures and narration. The steps you need to follow are pretty simple:
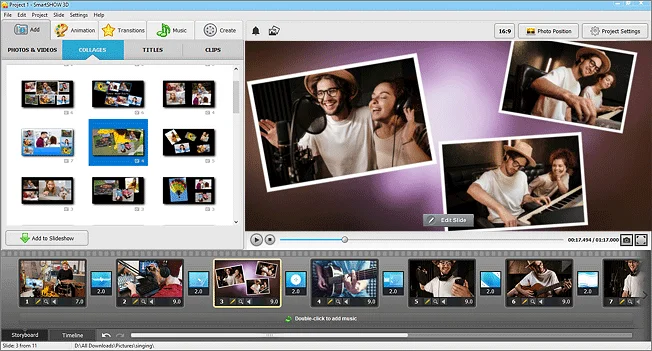
Step 1. Browse Through Your Photos
Browse through your photos and pick the shots that are suitable for your script. Arrange them on the Timeline. If you have lots of photos on one subject, group them into collages. You can use pre-made slideshow templates or quickly group up the pictures manually. This will keep your video short and informative. Apart from photos, you can add video clips as well. Mix them with pictures or use as a background for the collages.
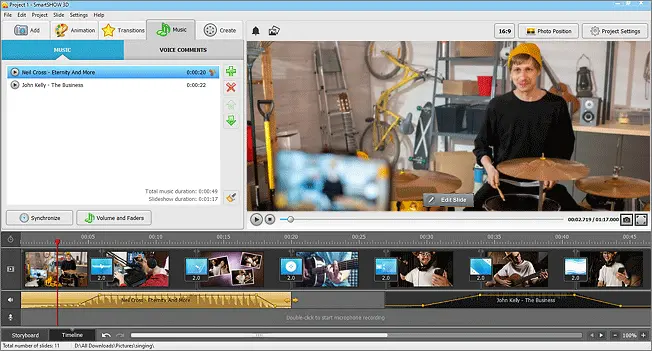
Step 2. Make the Perfect Music Mix
There is no photo slideshow without music. Add one of the 500+ royalty-free songs from the built-in collection or drop in your own music. Switch to the Timeline view and fine-tune the sound using Audio Points: right-click a song and add a few. Move down the points in the middle to lower the music volume in certain places. If you want to adjust the volume for the whole track, then go to Volume and Faders. Here you can add fade-in and fade-out effects, as well as change the volume of the main audio stream.
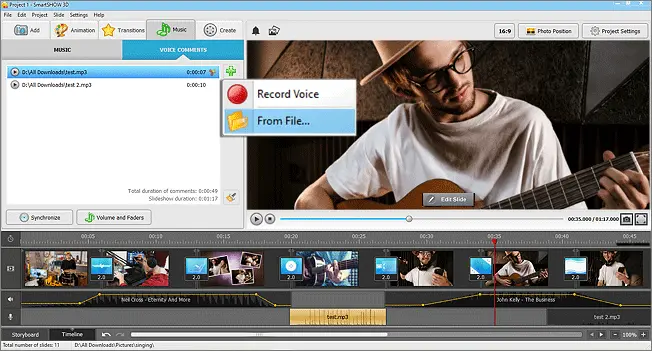
Step 3. Record a Perfect Voiceover
Go to the Voice Comments tab and click Record Voice. Once you are done, the voiceover will be added to the second track. You can edit the comments just like music: cut, fade, reposition, etc. To record your voice comments for a certain part of the slideshow, open the slide editor window (simply double-click on the slide) and switch to the Sounds tab in the top right corner. Click Record Sound and then Start Recording. Keep an eye on the recording duration – it shouldn’t be longer than the slide duration.
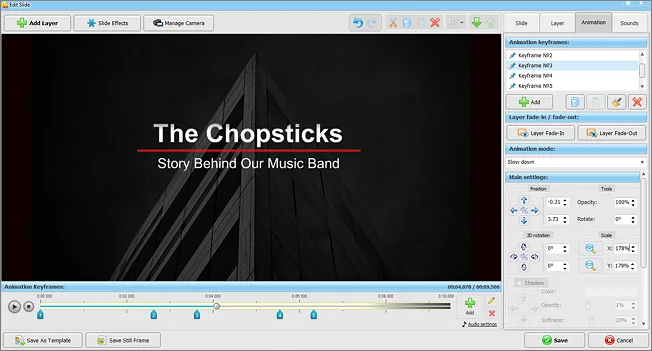
Step 4. Add Stylish & Funky Intros
Have a large project? Divide it into several parts by adding cool-looking intros between the chapters. There are dozens of ready-made templates in the Titles collection to choose from. Just add the desired template to your project and replace the default text with your own. It’s a perfect option if you want a professional text animation but have no time to fiddle with the settings.
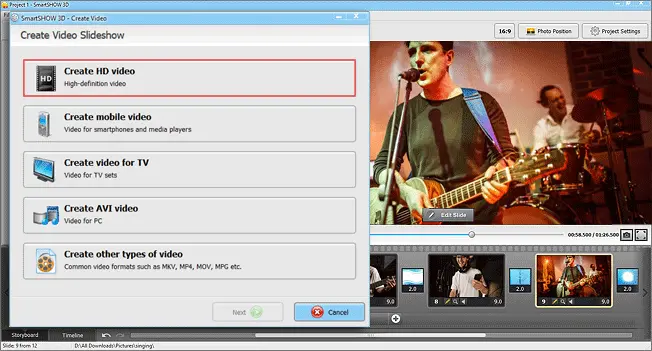
Step 5. Create Your Video
When you’re done with the creative part of the work, go to the Create tab and export your project to video. SmartSHOW 3D offers 30+ video formats, including slideshow for Facebook, YouTube, TV and even DVD burning. There is a helpful step-by-step wizard for creating video – it will guide you and give prompts to ensure perfect quality output.
Follow these easy steps and create your own slideshow with voiceover! Start with downloading SmartSHOW 3D for free:
Prefer watching video guides over reading text? Watch this video and discover how to make a voiceover slideshow:

Although there are other software that allow you to make slideshows, like PowerPoint and iMovie, you won’t be able to do much with their help because of their limited toolkit. However, they’ll work just fine if you urgently need to make a simple video with voice comments.
If you want to make a gorgeous slideshow with a perfectly synced voice, then try SmartSHOW 3D. It doesn’t matter if you aren’t skilled at making videos. Thanks to a user-friendly interface, all the essential features will be at your fingertips. You can create photo and video collages, insert stunning transitions, apply 3D and nature effects, like snow or rain, create custom animations using keyframes and much more.
Frequently Asked Questions
Why is voiceover important in slideshows?
Audio narration is an effective storytelling tool that is widely used in educational videos, travel vlogs, and family slideshows. While some people prefer visuals, others comprehend better when they listen. A combination of stunning photos and a high-quality audio narration can make your slideshow perfect for any viewer.
How do I record audio narration?
You can record voice comments using any device with a built-in microphone and add them to slideshows as audio files. There are also programs that allow you to create an audio narration while editing your video.
Which software is best for voice-over?
If you want to record, edit, and add voiceover to your slideshow, then SmartSHOW 3D might be the right choice for you. It lets you erase unwanted parts of your recording and change its volume. By the way, you can make your audio narration more engaging by adding background music. This software has 500+ royalty-free tunes, but you can upload your own files, too.
How do you add voiceover to a slideshow?
Once you insert pictures into your slideshow and arrange them in the desired order, you can get down to voiceover. In the Music tab, select Voice Comments and begin recording yourself. Alternatively, you can click From File and upload the audio file you created earlier.


Get started with SmartSHOW 3D!