How to Make a 3D Slideshow
Looking for an attractive way to share photos with your friends? Some people like arranging their pictures in themed albums, however, they aren't easy to keep - your photos can quickly fade away or even get lost. Others prefer posting their works online, but digital photos often remain unnoticed among other digital content like videos, clips and movies.
That's why we want to suggest an original and creative way – making a 3D slideshow with effects and music. You will need a handy tool for that, such as SmartSHOW 3D software. It's a powerful and friendly program with 600+ templates & effects. Now we’ll give you some useful tips and steps on how to make a 3D video slideshow.
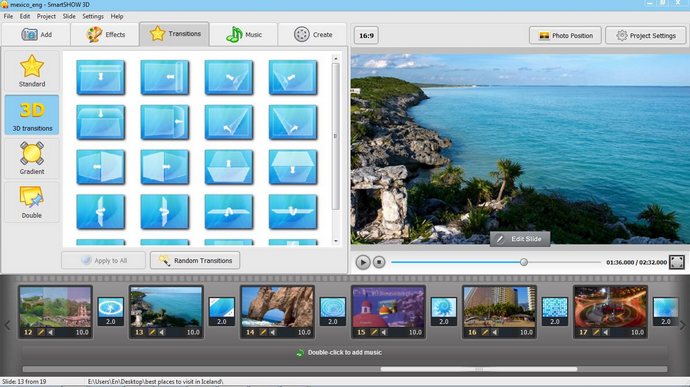
Apply 3D Transitions
When you added the photos to the project, switch to the Transitions tab. The software has a pack of cool slideshow transitions to choose from, so try them all out to choose the most suitable ones for your slideshow. You can preview a preset before applying it to a slide. Thus you will make your slideshow quite entertaining and vivid!
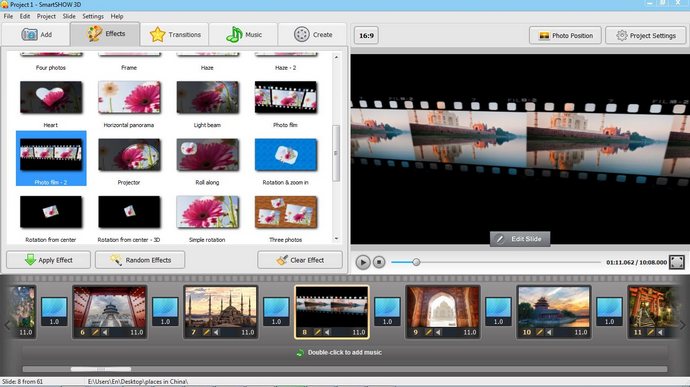
Use 3D Special Effects
Now move to the Effects tab. Here you will find lots of special effects that you can use to spice your project up. Choose from spectacular rotations, flips and unique 3D illusions and other awesome stuff. Each effect can be previewed in a built-in video player so you can pick something suitable for your 3D video slideshow.
Customize Slide Animation
The previous steps were for newbies in slideshow creation, this one is aimed for more advanced SmartSHOW 3D users. The software allows you to set up your own custom 3D animation for each slide. Start with inserting a blank slide (right-click on the timeline, or press Ctrl+Ins) and click the Edit Slide button to open the editor.
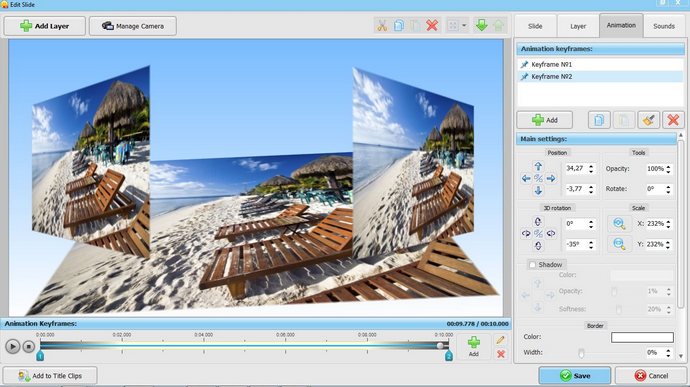
Use the Add Layer button to add photos, cliparts, and text captions to the slide. Now select a layer and click on the Animation tab. Set up animation with the help of keyframes. Position the object for the first keyframe, then add the second keyframe and adjust its settings: 3D rotation, scale, opacity and so on. Click Play to preview the result and repeat the steps for other slide objects.
Play with 3D Camera
One of the SmartSHOW 3D unique features is the 3D Camera. It lets you to apply an animation to all objects on a slide at once! Just switch to Manage Camera and add keyframes the same way you did in the layers animation step. Apply zoom in or zoom out, experiment with the rotation angle (both simple and 3D), and of course, adjust the initial and the final position of the “camera eye”. For example, you can make the slide fly straight into the viewer or make them disappear completely. This is a perfect tool to play with while creating your 3D photo slideshow with music.

We’ve shared some useful information on how to create a 3D slideshow. We hope that this article will help you to learn some new tricks to make your slideshows exciting and unique. If you are still hesitating – check out the free trial version of SmartSHOW 3D to try all the cool features by yourself!


Get started with SmartSHOW 3D!